Thursday, December 30, 2010

Fireplaces and New Years

One of my biggest regrets about our house is that there is no fireplace. No fireplace in a New England home? I know, crazy. When we were house shopping fireplaces were pretty high on my list but I compromised because our house has an amazing backyard view, a huge deck and two full bathrooms which makes having guests much more convenient. I tried to compensate not having a fireplace with having a chimenea. No one up here knew what a chimenea was so I think it may be a Southern/Southwest thing but I finally found one up here this summer and it has been happily installed on my deck since July.

However, the weather turned from lovely and warm to this:
My first blizzard on 12-27-10. We ended up with about 14"
As you can see, the chimenea is not only not accessible but also a bit impractical since I am fairly certain all my important extremities will fall off if I sit out there long enough, even with a small fire. I have been mourning the tragedy of not having a fireplace ever since it got cold. I went home for Christmas and my mother surprised us with an electric fireplace! I have always thought they were extremely cheesy and don't look realistic but I realized that technology has come such a long way. They not only look very realistic  but also can put out heat, you can adjust the flame level, and do all sorts of cool stuff. We shopped around quite a bit and we finally settled on one we liked at Lowes. It has ceramic logs that really help with the illusion and also a grate in the front, just like a regular fireplace. After purchasing our new addition, my lovely husband was able to assemble it within an hour and just like that my wish was granted! I now have a wonderful fireplace that is almost always on and putting off a romantic firelight glow.
I absolutely love it and I am so happy that I have a mantle to display our wedding pictures and to hang stockings on (which I never did this year but will definitely do next year!).

I hope everyone has a wonderful New Year's Weekend. I am happy that Logan actually has the day off so we going to watch some Sooner football and eat our black eyed peas (for luck), spinach (for prosperity) and also ham and macaroni and cheese because they are delicious. My family has been doing a similar New Year's Day meal for as long as I can remember and once again, since Logan and I are on our own, it is up to us to carry on the tradition. One of my favorite parts of being married has been creating our own traditions that someday our children will pass on...we always buy a Christmas ornament when we travel, we celebrate Valentines Day on February 28th because it is when Logan proposed and it's double as romantic (get it 14+14=28...I know we are kind of nerds), we build a gingerbread house on our anniversary (12-19) and we always kiss goodnight....just some examples. I think I will have a few New Year's resolutions this year but I am still not sure on exactly what I want to do. I know resolutions are kind of silly but it is a chance to improve and start fresh which I always love. 2010 has been a good year for me...I traveled to Asia on a mission trip and spent weeks traveling all over Europe with my wonderful husband, hiked up a waterfall, played in the deep purple green waters of Martha's Vineyard,  moved to a new state, relearned how to play Warsaw Concerto on piano, bought a house, and my favorite, celebrated my 1st wedding anniversary. I know that 2011 will be just as special and exciting.

The days are long and the years are short,
Steph

Thursday, December 23, 2010

A Tale of Two Cookies Part 1

I know, I know, I know...it has been almost a month since I last posted. I have been so busy this month with traveling, getting my application together for a Ph.D. program and holiday decorating. A quick recap: Thanksgiving went wonderfully although it was still strange setting the table for only myself and Logan.
It was nice deciding exactly what dishes I wanted to make and everything came out so tasty. I also got to use my china which so far has only been used our first night in the house when we partook of pizza and champagne.

In case you were wondering, the red stuff in the wine glasses is Cranberry Zinfandel, a wine made locally. I was not a fan because it tasted a lot like cranberry cocktail juice. Anyway, it was a fabulous meal and then less than a week later we traveled back home to Tulsa. Since Logan is on call during Christmas we celebrated the holiday while we were in town. I ate even more turkey, dressing etc. and now I am so sick of turkey. We are eating a ham for Christmas and thank goodness.
So back to the cookies, Logan is on call on Christmas (last time this happens ever since he chose an elite and cushy field that he starts next year) so I thought I would make him cookies to take up for him and his fellow residents to enjoy. I made traditional Snickerdoodles and a devilishly delicious Snickers Bar Cookie.
First up: Snickerdoodles
I used the Better Homes and Garden's recipe and the only thing I changed was adding a bit of salt because I firmly believe every cookie recipe should have at least a pinch of salt to balance everything.
Snickerdoodle Recipe
All your ingredients...except the salt cause I added that later :)
I won't put too much instruction on this recipe since the link goes into detail but first you cream your butter and sugar, soda and cream of tartar and then add your egg and vanilla and beat until it is nice and fluffy. Then add your flour and voila! a snickerdoodle batter is born. It is kinda ridiculously simple and the cream of tartar really makes it.
Delicious buttery snickerdoodle batter...may have to taste just to make sure it is yummy
I went ahead and let it chill for an hour since I needed to make the other cookie batter. In the meantime, mix 2 TBS of sugar (did you know 2 TBS equals 1/8 cup? finally a use for the little called for measuring device) and 1 Tsp of cinnamon. Once your dough is nice and cold, take a small hunk--the recipe calls for 1 inch balls but I just kinda eye-ball it--and roll it into a ball and then roll the ball in the cinnamon-sugar mixture.
Put them on a cookie sheet and bake them at 375 for 10 mins and you have delicious, soft, and buttery snickerdoodles.
Before

After!
I have played around with this recipe a bit before. I really like adding a bit of cocoa powder to the batter and a bit of ground red pepper to the cinnamon sugar. It gives them a Mexican chocolate flair and the sweet/spicy is really tasty and interesting.
Part 2 will be the Snickers cookies and some Christmas pictures!
Happy Holidays,
Steph

Wednesday, November 24, 2010

Cranberry Apple Cider Sauce...good enough to eat plain

Thanksgiving is in T-minus 24 hours (I am planning on sitting down for our feast at 2pm so we can still have some daylight to take a turkey hazed walk before gorging on pie.) I actually made a schedule for myself and I am pleased to have completed my Wednesday tasks! I made my cheese ball, spiced nuts, dough for potato rolls (which is quite the involved process since you have to make mashed potatoes first), and cranberry apple cider sauce. I had heard of a similar concept on some food network show so I took the idea and ran with it. I had never made this recipe before since I made it up but I am so ridiculously pleased because I could eat this cranberry sauce plain...and may have done that a bit...*shame face*.

Cranberry Apple Cider Sauce:
This is a really easy recipe and it let me get rid of the last of the apples from the orchard and I think I will eat this sauce on biscuits, yogurt and fingers so do yourself a favor and make it...it only takes like 20-30 minutes so go do it....now...well first read the recipe then do it :)
The Cast! Except for the secret ingredient...
Since this is not a traditional sauce you replace the water for apple juice or apple cider (whichever you have) although if you use apple juice you may want to put more spices in it. Add the juice and your sugar and dissolve in a pan over medium heat and then add the secret ingredient!

Just a shot or so, enough to make it full of deliciousness
Then add your cranberries, chopped apples, cinnamon, and nutmeg. I tossed in a few cinnamon sticks because I am wild and crazy like that.
Pretty!
Stir it all up and let it heat over medium heat for about 20-30 minutes. It is awesome because you will hear the cranberries make these popping sounds as they explode. Let it heat until all the cranberries have exploded because as they do this they will release pectin which will thicken your sauce nicely.
I kept taking pictures because I thought it was so pretty.
After a while it will be nice and thick so give it a taste to see if you need anymore sweetness and spiciness. I will warn you, the quantities in the recipe make a fairly tart sauce because that's what I like so adjust if you need a really sweet sauce.
Voila! Delicious cranberry apple cider sauce!
This recipe makes about a bowl full and seriously, it is really yummy on just about anything. Let me know if you have any variations of cranberry sauce that you use, I am new to the cranberry and I am excited to try new recipes. The next cranberry one on my list is:
http://thepioneerwoman.com/cooking/2010/11/nantucket-cranberry-pie/
It looks so tasty and her recipes are always yummy.
I hope everyone has a wonderful Thanksgiving!

Cranberry Apple Cider Sauce
1 12oz bag of cranberries
1/2 cup of apple juice or apple cider
1/4 cup of sugar *add more if you like a sweeter sauce
2 apples, peeled, cored and chopped-as always I like Granny Smith
1 Tsp of cinnamon *and feel free to toss in some cinnamon sticks
1/4 tsp of nutmeg

And lastly for your enjoyment, a picture of my cat sticking her tongue out at you :)


Thursday, November 18, 2010

Thanksgiving Menu

My family and I take Thanksgiving and Christmas very seriously. We create entire menus, make everything from scratch and always make too much food. Usually my mom hosts Thanksgiving where we cook for most of the day and then sit down to a nice meal and talk about what we are thankful for and write it down and put it on the Thanksgiving tree--this is a family tradition that started because I love having a Christmas tree up but it is just too early so we decorate it in Thanksgiving colors and write down on paper turkeys and autumn leaves what we are thankful for and prayer requests on put it on the tree. The best part is that we save them throughout the years and it is really fun and nostalgic to look through the thoughts of years gone by.

This year Logan's vacation isn't for another few weeks so I am creating a Thanksgiving menu for two. Making a menu for two people is ridiculous for Thanksgiving because I just can't eliminate anything! I have to have my favorite sides and desserts so I cut down a bit but there is still going to be a ton of food.

Thanksgiving Menu 2010

Appetizers:
Spiced Hot Buttered Rum Cider
Roasted Spiced Pecans
Chives and Herb Cheese Ball

Main Course:
Herb Encrusted Turkey Breast with Giblet gravy

Sides:
My Aunt's world famous, prize winning Potato Rolls
Cornbread Stuffing with Spicy Sausage and Sage
Yukon Gold Mashed Potatoes with Parmesan
Green Beans with Caramelized Onions and Bacon
Apple Cider Cranberry Sauce

Desserts:
Southern Sweet Potato Pie
Old Fashioned Gingerbread with Maple Rum Whipped Cream

I have never made this much food in one day (although I am making the potato roll dough the day before because it sits for 8 hours) so I am nervous we are going to end up eating at 9pm. At least I am making rum cider so I will be very happy while I toil in the kitchen. This has been the first time I have gotten to choose what is on the menu and make exactly what Logan and I want so it will be fun to try new things. I haven't had gingerbread in years and I never have made a homemade cranberry sauce! I can't wait to share the holiday with my husband for the first time. In other news, we bought a Christmas tree yesterday and I am making holiday cookies this Saturday to nibble on while we decorate the house for my favorite holiday :) I'll post pictures next time. I hope everyone has a great Thanksgiving! What dishes are you going to make?

I am making Scented Pine Cones to make the house smell nice and I love to decorate with nature. So here is a quick recipe for those that have a surplus of pine cones: get a bunch of pine cones and rinse them off and let them completely dry. Put them in a sealed bag with several drops of scented essential oil (I am using a combination of cinnamon, apple cinnamon, and Christmas wreath-you can get these at craft stores like Michael's) Seal the bag and shake several times to distribute the oil. Keep the bag sealed for at least a couple days although the longer the better.Shake the bag every few days. Once you open it you will have wonderfully scented pine cones! I put mine in a tall glass vase and I think it is mighty pretty...you can also put them in a basket with some dried orange slices or cinnamon sticks.

Happy Thanksgiving!
Steph

Friday, November 12, 2010

The Best Apple Recipe Ever

It is starting to get really chilly up North and we actually got our first snow a few days ago! I was so excited but it was pretty much the most lame snow ever since it was barely a sprinkling, melted within a couple hours and was then warm enough later for me to rake leaves. I can't wait for the first REAL snow because I absolutely love walking around while it is snowing and coming home and having a cup of hot chocolate. Snow also equals holidays for me and starting next week I am going to go ahead and decorate for Christmas. I don't really have any Thanksgiving decorations and I like Christmas ones much better so it is going to come a bit early in our house. Last year we didn't get to celebrate Christmas in a traditional way (since we were laying on a beach drinking cocktails on our honeymoon) so this year I really want to go all out.

Now for the promised apple recipe:
I don't want to be responsible for destroying all other apple recipes but seriously this is one of the absolute best recipes and it is so simple. I have made this recipe countless times and I always get tons of compliments and people wanting to take leftovers home which is my favorite compliment :) Please, just make this and you will not be disappointed.

Apple Butterscotch Tart
This is a ridiculously simple recipe that really tricks the people who eat it into thinking that you slaved over a stove but I can write this recipe in just a few steps. First, you line your tart pan with pie dough (I waver between making my own crust and using store bought dough depending on how much time and energy I have...both versions turn out well) and trim away excess dough. I like to combine all the leftover dough and then cut out themed shaped like leaves or pumpkins to decorate the tops. Williams-Sonoma has great crust cut-outs that I REALLY recommend. It makes it much easier and it ends up looking great. Fall Crust Cutters
Then you get to work on your apples. I like to use Granny Smith apples in this recipe since it can become too sweet if you aren't careful and so you really need the tartness of granny smith, also they cook beautifully. Peel and slice about 5 cups of apples thinly.
Toss your apples into your crust and then sprinkle the butterscotch chips over the apples. I kinda shake it a bit to get the chips distributed and because I like a lot of butterscotch chips.
Mmm....love it!
Then you blend your flour, brown sugar, salt, cinnamon, and butter until the mixture looks like coarse crumbles. I use a pastry blender sometimes but I get annoyed when the butter keeps getting stuck between the blades so if I am impatient I just use my hands and it goes much faster. Toss in your chopped pecans and you're good to go! Sprinkle the deliciousness over your apples/butterscotch chips and you're pretty much done.
This version has no pecans because I was out but trust me, it is much better with pecans, it gives it a bit of salty crunch. I also did a last sprinkle of cinnamon on top.
Just toss your creation in a 375 degree oven for 40-45 minutes or until your apples are nice and tender and that's it! Let it sit for a while before you try to remove the side of the tart pan or it may get a bit messy.
All baked and ready to eat
Logan loves this served with vanilla ice cream but I am purist and love it by itself with maybe a bit of whipped cream. This recipe is one of my absolute favorites because it is ready quickly, has few ingredients and gives you such a warm, comforting, and flavorful result. This tart is equally at home on your table for a quick weekday dessert or all dressed up for a formal sit down Thanksgiving meal but no matter where you eat it, I guarantee you will enjoy the wealth of fall flavors.

Apple Butterscotch Tart
1 Pastry for single-crust
5 Cups of peeled, thinly sliced apples (recommend using Granny Smith or any other tart cooking variety)
1 Cup of butterscotch chips
3/4 Cup of flour
1/2 Cup brown sugar
1 Tsp cinnamon
a dash of salt
1/3 Cup of chopped pecans
*ice cream or whipped cream for topping*


Thanksgiving is in less than two weeks! I'll definitely be posting my menu (I am making a ridiculously large amount of food for just two people) and posting pictures of my first year of holiday decorating in a house! What are your own Thanksgiving menus looking like? Are you going traditional turkey feast or outside the box?
 
Counting down till Thanksgiving,
Steph

Thursday, November 4, 2010

Apples, Apples Everywhere


I will warn you that my next few posts will include apple recipes because last weekend Logan and I went to a Pick Your Own produce farm and came home with tons of apples. I already have made an apple butterscotch tart (will post about that next time) and today I made homemade applesauce and in a few days I'm planning on making Apple Bisque with Chestnuts (will post about later). I am nervous about the apple bisque because I can't really imagine an apple soup but I am assured that it is not really that sweet so we shall see...and also I have no idea how to cook with chestnuts. I told my mom about the chestnuts and she said "Stephanie, that is a Yankee thing. Don't get too attached to the chestnuts" :) This is why I miss my mom.

Homemade applesauce is one of those ridiculously easy recipes that gives you an amazing product. You can make as much or as little as you want and it freezes so well. I know that come February I am going to be so happy to eat some applesauce that actually tastes like fresh fruit so with no further ado...
I love how Pioneer Woman has all her ingredients set out in her pictures so here we go.
At the orchard we picked Red Romes, Red Delicious, and Granny Smiths. These are all great cooking apples. I really recommend mixing your apples when making applesauce because you will get a much more rounded flavor. The most labor intensive part of this recipe is the apple prep. You need to peel, core and quarter your apples. I usually use around 3-4 lbs of apples but this recipe adjusts really easily so just use what you have available. Put your naked apples in a big pot with around 1 cup of water, lemon peel, lemon juice from 1 lemon (more if you like tart applesauce), lots of cinnamon! I put in 4 sticks of cinnamon and a good sprinkle of cinnamon (if you aren't crazy about cinnamon then use 1 stick and as much cinnamon to your taste), salt, brown sugar and white sugar (I use splenda to keep calories down and it works great). I also tossed in a bit of nutmeg because I am nutty like that :)
I love recipes where you just toss everything in one pot.
Now, you are pretty much done. How quick and awesome is that?!? Turn up the heat until the water boils and then turn it back down low/medium, cover your pot and simmer for around 30 minutes or until your apples are all squishy and falling apart.
The apples will produce a lot of liquid and will fall apart when poked with a spoon when they are ready.
 Remove your cinnamon sticks and try to remove your lemon peel. I couldn't find mine so it got mashed up with the apples, oh well. *Edit-after the applesauce cooled and I was packing it up I actually found most of them so apparently the trick is to go fishing after it cools*I also usually rinse my cinnamon sticks and use them again unless they have been used a ton. Now the last step it is kind of up to personal preference. I like a rustic, kind of chunky, applesauce so I just squish mine with a pastry blender (because I don't have a potato masher) and it works just fine but I imagine you could use an electric mixture or even a blender on a low setting if you want a really fine, smooth applesauce. This is also a good time to taste it to see if it needs more spices, sugar, salt etc.
Mmm.....so delicious
Applesauce is great hot or cold and freezes beautifully so go crazy. I love it on peanut butter toast (sounds nasty but it is delicious. This is a great holiday/fall recipe because like many of my favorite recipes, it makes your whole house smell so yummy. I recently discovered the music channels on our tv so I have been playing Christmas music non stop and starting my Christmas decorating so to me this just smells like the holidays. Do you guys/gals have any recipes that you *must* make during the holidays? Applesauce is one of mine, as are sugar cookies, gingerbread and lots of things with pumpkin :)

Homemade Applesauce
3-4 lbs of cooking apples, peeled, cored and quartered-I like to use Granny Smith, Golden Delicious, Red Delicious, Red Rome, or Fuji ( I think I ended up using around 10-12 apples)
1 cup of water
3/4 strips of lemon peel
Juice of one lemon-around 3/4 Tbsp
Cinnamon Sticks-I used 4 but 2 had been used before for making cider last weekend so they weren't full strength
A really healthy sprinkle of cinnamon (I like a really cinnamon-y applesauce so I would suggest starting with a bit and work your way up unless you are a huge fan like me :)
1/4 cup of brown sugar
1/4 cup of sugar -I use splenda and it works great. (you may need to use more or less depending on how sweet your apples are so I usually start with a bit under a 1/4 cup and add more after cooking if it needs it)
1/2 tsp of salt
a bit of nutmeg if desired

Hope you bring a bit of the holidays in your home,
Steph

Sunday, October 31, 2010

Happy Halloween!

Happy Halloween!
Halloween is one of my favorite holidays because there is tons of candy, spooky stuff, horror movies and kids in adorable costumes. It is also the mark that Christmas is on its way and winter is coming which for me, especially now that I am so north, makes me excited about the first snow of the year.

Our neighborhood is super kid friendly so we got hundreds of trick or treaters with the cutest costumes (there was a little guy in a T-Rex costume!) but unlike Tulsa where the candy giving continues until around 9pm, things shut down by 7:30pm. It was weird. Logan and I went outside and wandered just to see if there were any stragglers because we have tons of candy left. Who would have thought it would end so early? A bit sad that it is all over but I now get to start planning my first Thanksgiving menu (I have always helped my mom so this one will be my first solo adventure) and also get to start thinking about Christmas decorations. One big expense moving from an apartment to a house is the fact that you need to get a Christmas tree, outdoor lights and all sorts of great holiday fluff.

Quick entry since I am slightly sick from eating too much candy so here are some pictures of our great Jack O Lanterns. I am so pleased at how they turned out! Logan carved the haunted house and I did the bat :)
My Evil Bat! Run for your life!
I got bored because Logan took forever to carve his so I carved our initials into the back with a sorta heart
Haunted House!
Delicious toasted pumpkin seeds
I love toasted pumpkin seeds and I have not had them in years so when we decided to carve pumpkins I was so excited! Always line your pans with aluminum foil and clean up will be a breeze so the ones up the picture are spicy (on right) and cinnamon sugar (on left). Just clean your seeds; I like to barely rinse mine because I think a bit of goo on them makes them taste more pumpkin-y and that's how I roll :) Anyway, drizzle with olive oil and sprinkle with whatever seasonings you like. For spicy I use cumin, paprika, red pepper, chili powder and salt. For cinnamon I use cinnamon, a bit of ginger, nutmeg and some sugar. Bake in a 325 degree oven for about an hour and stir every 10 minutes or so. Just be sure to watch or your seeds will get burned!

Happy Halloween!
Steph

Monday, October 25, 2010

When times get tough, make vegan cupcakes

I am feeling a bit down today. Logan is on call (as he is every 4th night this month) so he left before 6 this morning and I won't see him until tomorrow afternoon. If I were in Tulsa this would be no big thing--I would hang out with my mom and aunt, have girl time with Katie and Ashley, catch up with work friends, church friends etc but here I am kind of aimless. I just really miss having people around.I entertained for one of the first times yesterday...wait for it...I had the 12 year-old girls who raked my yard in for hot apple cider and then they proceeded to talk my ear off for an hour so perhaps I should rephrase to I miss having people my own age. My neighbors are a good 10-15 years older and have kids so we are in very different life stages. I miss having someone to talk about the latest episode of Grey's Anatomy, to play silly games like Cranium and to simply share a glass of wine while chatting about newlywed life. I think Logan and I are going to have some of his work friends over this weekend so at least I'll get to entertain myself by creating a Halloween themed cocktail and fun spooky finger food.

On a happier note, Logan and I have continued to explore Connecticut. We went out to Storrs (home of the University of Connecticut) and we walked around the campus. It does not hold a candle to Norman--in my humble, unbiased opinion :)-- but it is stunning. The school has a farming program so they have a working dairy farm on site. They make ice cream there and have a Dairy Bar. Check out of the website but I warn you, you'll probably crave ice cream!
http://www.dairybar.uconn.edu/
IT.IS.AWESOME. They have tons of homemade flavors and so I sampled pumpkin with graham crackers and Logan had Pistachio with walnuts and they were some of the best ice cream either of us have ever tasted.
Logan enjoying the beautiful day and his delicious ice cream
The fall colors are absolutely beautiful here. It is one thing I will say that I will miss we move back home is the fall color in New England. We walked around the pasture area just enjoying the view and the crisp fall temperatures.
Can you believe this is on a college campus?
So, in closing the vegan cupcakes...I halved the recipe and made 6 chocolate cupcakes with chocolate ganache frosting. There are still 4 left but the night is still young. Vegan recipes are great to half because there are no eggs so it is super easy to make only as many as you want. This was my first time trying vegan baking and honestly, if I wasn't the one who made it, I wouldn't have known. They are moist, chocolatey and delicious and since you don't use butter or eggs the calorie count is much lower. Anyway, they definitely make for a tasty treat!
Mmm....Cupcakes :)
The recipe is really easy and seems like it can be adapted easily since I tossed in some Godiva Chocolate liquor and it turned out great.

Vegan Chocolate Cupcakes (recipe makes 12 cupcakes)
1 cup soy milk
1 tsp apple cider vinegar
3/4 cup granulated sugar (1/2 splenda works fine)
1/3 cup oil
1 1/2 tsp vanilla extract
1 cup flour
1/3 cup cocoa powder
3/4 tsp baking soda
1/2 tsp baking powder
1/2 tsp salt


*I reduced the vanilla a little bit and added in some Godiva liquor and it was very yummy*

First, preheat the oven to 350 degrees and then mix the soy milk and vinegar and let it sit for a few minutes so it can curdle (I know, kind of gross but will be worth it). Add the sugar, oil and extract to the mix and beat until nice and foamy. Get all your dry ingredients together and add them to your wet ingredients in two batches and beat until no big lumps remain. Pour into your cute cupcake liners and bake for 18-20 minutes or until a toothpick comes out clean. Cool completely before frosting or it becomes a big mess!

Chocolate Ganache Frosting
1/4 cup soy milk
4 oz semisweet chocolate bits
2 Tbs maple syrup ( I used sugar free since that's what I had and it worked fine)

Heat your soy milk until boiling and then remove from heat and add chocolate and syrup. Stir until it is nice and smooth (you should now taste it...just to make sure its good...and maybe a second taste just to be 100% positive). Just dip your cooled cupcakes in and give them a nice chocolate bath. Let them sit for a while and the ganache will be less drippy but trust me, a hot ganache cupcake is just as delicious, if not more so, as a cold ganache cupcake.

Recipes from:
Vegan Cupcakes Take Over the World by Isa Moskowitz and Terry Romero
http://www.amazon.com/Vegan-Cupcakes-Take-Over-World/dp/1569242739
-I highly recommend this cook book. The recipes are yummy and have some really tasty sounding treats like Smores, Toasted Coconut, Green Tea, Hazelnut Mousse, Chai Latte, Mexican Hot Chocolate cupcakes but also your old favorites of vanilla and chocolate with a ton of great variation ideas.

Vegan baking. Who knew it was so easy and delicious?
Steph


Tuesday, October 19, 2010

New England Fall + Spiced Nuts

 "Delicious Autumn! My very soul is wedded to it, and if I were a bird I would fly about the earth seeking the successive autumns." -George Elliot

I am over 1200 miles from home; it is currently getting down to the 40s at night; snow within the next month is a strong possibility. All of this is okay because I am in awe of my first New England fall.

In Oklahoma we get very beautiful fall colors but the trees here are just jaw dropping. Yesterday I drove out to the UConn campus for a meeting and along the drive I kept wishing I had my camera because I kept seeing beautiful tree after beautiful tree. Logan and I are going hiking this week so I will take more pictures but here is just one from my backyard. I was shocked when I got home from my two weeks in Oklahoma because all of a sudden the trees were ablaze with gorgeous color. I can't believe that this is my backyard...I love just sitting on the deck with a fire in the chiminea, drinking coffee with cinnamon and just enjoying the crisp fall air...I just wish Logan (or friends or family) were here to share it.
View from deck
Originally I was just going to post this as is but here is a really quick recipe that I whip out when I want a snack or need to convince Logan to mow the lawn.

Spiced Nuts
Beat one egg white (save the yolk and make some sort of custard or something later) and 1 Tbs of water till nice and frothy. Pour egg white/water mixture over about 3 cups of pecans (I imagine you could use other nuts but I always use pecans because I am sort of Southern and it is in my genes, also pecans are delicious) and stir until all the pecans are moistened. In a bowl, mix sugar, salt (I am a big fan of coarse sea salt...I am convinced it is more tasty than other varieties), cinnamon, cloves and nutmeg and then sprinkle over the nuts. Spread the nuts on an aluminum foil covered pan (helps with clean up) and bake in a 350 degree oven for about 30 minutes stirring 2 or 3 times during baking. Watch your nuts for the last 10 minutes or so because some ovens cook faster/slower and you don't want to burn them.

The great thing about this recipe is you can modify it to make savory nuts with different spices. I have done some with rosemary, salt and pepper that were tasty. I also really liked a spicy version with red pepper, cumin and a bit of chili powder. Play with it and make some for when you have company coming for holidays; put them in a pretty bag with a ribbon when you need a quick gift or make them when you are hungry and scarf them all up.

Spiced Nuts
1 Egg White
1 Tbs of water
3(ish) cups of pecan halves
1/2 cups of sugar
1/2 tps of salt
1 1/2 tps of cinnamon
1/2 tps of ground cloves
1/2 tps of nutmeg

Happy Fall Color Watching and Nut Toasting!
Steph

Sunday, October 17, 2010

Pretty Crazy Delicious Pumpkin Bread

Hello Again! I am sorry about the long break but I spent almost two weeks back in Oklahoma and now am home again. Flying into Connecticut I was greeted by amazing fall colors and crisp fall temperatures that promise a coming winter (hopefully not too soon!). Therefore, is it really surprising that once I got home, I was back in the kitchen within a few hours? No, not surprising.

When I think of fall baking my first thought is pumpkin. It is so versatile-use it in a savory soup, a sweet pie, or a fragrant and moist bread. In honor of my husband's birthday I chose to make a pumpkin bread. It is one of his favorites because I always add extra cinnamon, nutmeg and do a pecan streusel topping. It is such dense, moist bread that it is more like cake in a lot of ways. My favorite way to enjoy it is a nice slice with a smear of cream cheese with a cup of coffee--add in a bunch of fall color and a deck overlooking the woods and you pretty much have my favorite place-home.

Pretty Crazy Delicious Pumpkin Bread: So first off this recipe makes two loaves if made in a 9" pan so I halved it because I have no idea what I would do with two loaves other than covet them like a squirrel with peanuts so hence: halved recipe.

The best thing about these types of breads is that they come together really fast. You find out you are having company in an hour? you can whip up this bread in 15 minutes tops and then bake and not only does your house smell amazing but you can impress your guests with fresh baked deliciousness.

So first off you beat your eggs, sugar, and oil together till nice and light and frothy. Then mix up your flour, spices (I kind of go crazy with the cinnamon and nutmeg since I love them but be as adventurous as your palate allows), baking soda and salt and set aside (try to avoid stepping away and thus letting your cat stick their paw in the flour because this makes a huge mess and happened about 10 seconds after this picture...I suppose this is only applicable if you have slightly evil kitties)
Libby's Pumpkin...oh how I love you since I never actually have time to roast my own pumpkin
Alternately add your flour and water into your egg mixture until just mixed. Stir in your pumpkin and your good to go. I always taste it at this point to see if I need more cinnamon, salt etc but also cause batter is delicious and I don't care if it has raw eggs in it...the amount of cookie dough I have consumed in my life is a testament to the harmless nature of raw eggs (at least when combined with sugar, flour and other cookie components...perhaps alchemy is involved?)
Making my streusel topping in my awesome immersion blender (yes, the same one from the butternut squash lasagna!)
Pour into your greased 9" pan and if you not feeling like a streusal topping go ahead and pop it in the oven but if you are feeling like a crunchy, sweet and yummy topping mix some brown sugar, cinnamon, a bit of flour and cut in your butter. I am now using my immersion blender because I think it is super awesome and I kind of hate using a pastry blender but to each her own--just get your butter in there till it looks like crumbs. Then put in your chopped pecans and sprinkle on your bread.
Ta Da!
Now bake the bread in a 350 degree oven for about an hour or until a toothpick comes out clean when poked in the center. If you made the topping, I like to cover it with aluminum foil for the last 10-15 minutes or so just because it can get a bit brown and you don't want burned nuts (haha dirty sounding)
The finished product! Don't be jealous of my cat pot holders...I know they are super cool.
As I said earlier, I love this bread with a smear of whipped cream cheese on it and with a cup of coffee but it is delicious plain, heated, or with some cinnamon butter...mmm...the possibilities are endless.
I didn't realize when I took this that Logan had already taken a bite when I wasn't looking. He swears it is delicious.

Pretty Crazy Delicious Pumpkin Bread
*This recipe makes 2 9" loaves,  or 3 8" loaves--it is really easy to half so feel free*

3 Cups Granulated Sugar (does fine with half splenda)
1 Cup Oil
4 Eggs
3 1/3 Cups of Flour (does fine with a 2:1 ratio of whole wheat flour)
2 tps. Baking Soda
1 1/2 tps. Salt
1 1/2 tps of cinnamon (I tend to use between 2-3 tps because cinnamon is delicious)
1 tps of nutmeg (I tend to use more just because nutmeg is amazing)
2/3 Cup of Water
1 15 oz. can of pumpkin

Streusel Topping: I don't really have a recipe for this so these are estimates so feel free to mess with it to fit your tastes :)
1/4 cup Brown Sugar
3 Tbs of Flour
Some Cinnamon
2 or 3 Tbs. of butter (just add enough to make it look like crumbs)
1/3 Cup chopped Pecans (or whatever nut you prefer)


Happy Pumpkin Baking!
Steph

Thursday, September 30, 2010

Fall Foods-Roasted Butternut Squash Lasagna

This is my first New England fall and many people have requested fall foliage pictures but apparently the fall colors won't truly hit for a few weeks so it is coming I promise!

We are visiting an apple orchard this weekend to pick apples, drink fresh cider and sample the famous cider doughnut so I'll post about that soon also. Fall has always been my favorite season and as soon as mid September hits I start decorating for Halloween, lighting the fall scent candles (I am loving Autumn Leaves by Yankee Candle) and my personal favorite, start cooking with fall flavors.

Fall flavors are my absolute favorite. The flavors are rich, decadent and meant to warm you up from head to toe. Once the leaves start turning it is my license to start making pumpkin cinnamon rolls, maple glazed acorn squash, apple butterscotch tarts, and of course, the subject of this entry: roasted butternut squash lasagna

Butternut squash is a delicious squash that has a fairly sweet flavor so to marry it in a lasagna with sage, nutty Parmesan cheese and salty, smoky bacon...can it get any better?!?

First step in this delicious dish is to roast your squash. You need about 3 cups of squash puree so in my experience you need two regular sized squash or one of those huge walmart monstrosities that make you worry about growth hormones. Now, this is your first chance to add some flavor so after I peel and cut up my squash I flavor it with rubbed sage, salt, pepper, and olive oil. Toss it in an oven for 40 minutes or until you squash is nice and squishy.
Before 
Ta Da! After
So eat a few pieces of your yummy squash but toss the rest in your blender (if you have a nice and powerful one-which I don't so I use my immersion blender and puree it)
I only put this picture on here to show how awesome my immersion blender is and the puree is actually ridiculously tasty! It would make a delicious ravioli filling or you could add some chicken stock and you have a great soup.
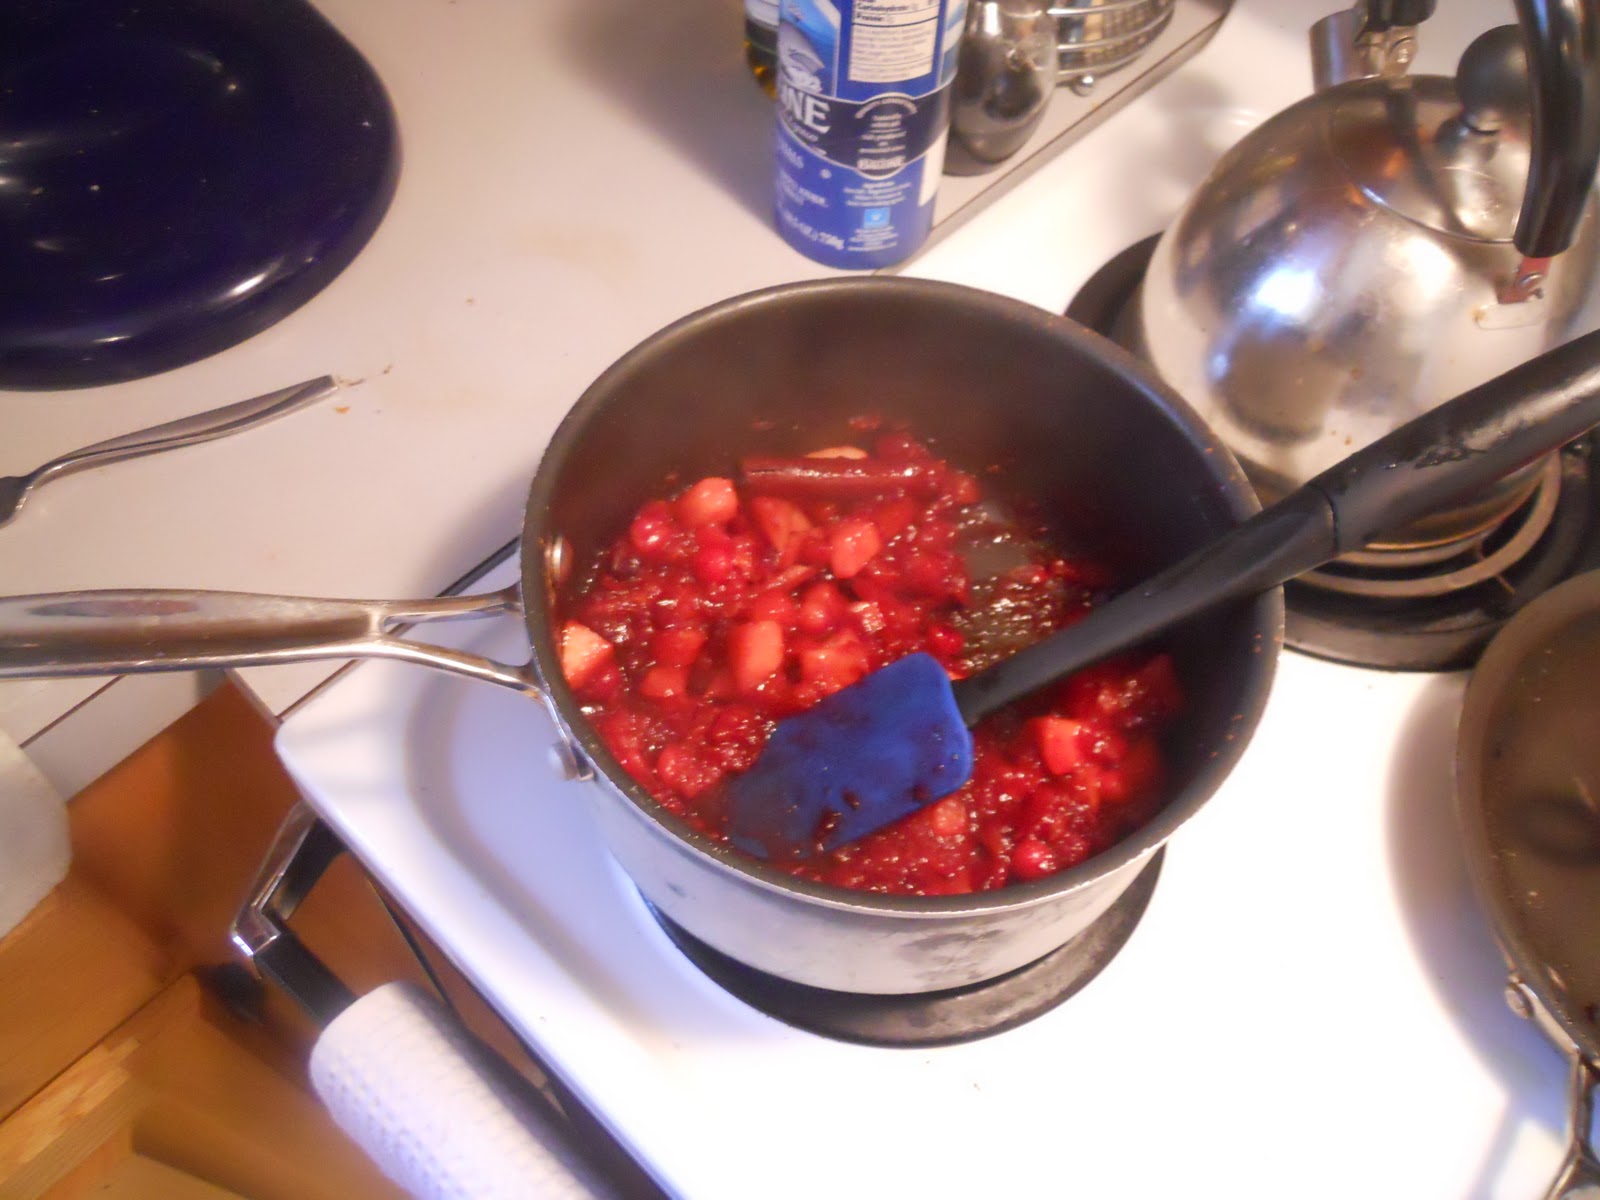
Now, what is a lasagna without sauce? Nasty and dry! So have now onto the bechamel sauce! Remember earlier how I wrote that this lasagna has a strong sage flavor? Well you chop up your sage leaves and let them get nice and crispy in your melted butter (this smells divine, try not to swoon).

Meanwhile, go ahead and fry up your bacon ( I used turkey bacon since I am watching my girlish figure but I think pancetta would be ridiculously delicious). Once your bacon is done, chop it up into little pieces and set aside. This is also a good time to go ahead and cook your lasagna noodles. I usually can fit four layers of pasta with this recipe so cook as many noodles as you need and set them aside. I like to lay my cooked noodles out on waxed paper because if you leave them sitting together they will stick together like crazy.
Bacon frying, sage crisping and noodles cooking...I will warn you that this recipe has many dishes. Try to con your significant other into doing them for you since you are "slaving away" at the stove :)
So back to the sauce...now the sage is nice and crispy, add your flour and stir it together and cook over medium heat till it is a nice golden brown color. At this point I like to add salt, pepper, and some nutmeg so season to your own taste. Once it is a nice color, go ahead and add the milk and stir until thickened-usually around 5-10 minutes. Toss in your chopped up bacon and now it is time to assemble.
My assembly area
Now, spread a ladle full of your sauce and a scoop of the puree in the bottom of your pan and put your first layer of noodles. Now, the fun part! Put another couple ladle scoops of sauce onto the noodles along with about 1/3 of your puree. Mix it all together till everything is evenly distributed and then sprinkle 1/4 of the Mozzarella and Parmesan cheese and add another layer of noodles.
Building the masterpiece!
Repeat until your top layer and then spoon the rest of your sauce on top of the lasagna and top with the rest of your shredded cheese.
Finished product. I love using glass pans because you can see the layers and beautiful colors.
Now all that is left is baking. Cover it with foil and toss it in a 375 degree oven for about 35 minutes, uncover and put it back in for about 10 minutes or as long as it takes for the cheese to get all melted and browned.
Delicious piece of lasagna...green beans are optional
I know this has quite a few steps but honestly, it is ridiculously delicious and it makes your home smell so yummy. I also love lasagnas because they get even better the next day and Logan and I can eat it for several meals.It is also a recipe that can be adjusted to your tastes; for example, next time I make this I will probably toss in some spinach to get more vegis in there and also for a nice texture and flavor contrast to the squash. You can also play around with adding meat but in my opinion it doesn't really need it.If you aren't careful this dish can become sweet from the butternut squash so season liberally-I think I may add some rosemary also next time to get an even nicer herb flavor (plus I love using things from the garden)

Happy Cooking!


This started out as a family recipe but I have edited it quite a bit so feel free to make it your own!

Roasted Butternut Squash Lasagna

 Lasagna noodles ( I like to use whole wheat)
4 Tbs. Butter
a bunch of fresh sage leaves, chopped (original called for 6 but trust me, you need more...I would guess around 15/20?)
4 Tbs. Flour
3 Cups of milk (I use skim and it works fine. Original called for 2 cups milk, 1 cup heavy cream but once again, watching girlish figure and honestly it tastes rich and delicious without it)
1/2 cup of grated Parmesan cheese ( I love Parmesan in this recipe because it has a nice nutty flavor so I increased it from 1 oz and decreased the mozzarella)
1 1/2 cups of grated mozzarella cheese
3 Cups of roasted butternut squash puree
1/3 cup chopped bacon ( I heartily approve of turkey bacon. It was very yummy but seriously, if you try pancetta please tell me how delicious it is so I can live vicariously through you)
Salt, Pepper and Nutmeg to taste

Friday, September 17, 2010

I am addicted to the leaf....no, not that one!

One of my favorite parts about picking up and moving across the country is the opportunity to explore an entirely new area. There are tons of restaurants to patron, book stores to explore, and coffee houses to frequent. A few weeks ago Logan and I went shopping in an area nearby that is simply amazing! It has great boutiques, a Crate and Barrel, amazing restaurants and it's all outdoors. It reminds me of a huge Utica Square (for those of you who live in Tulsa).

Anyway, I have always been a devoted coffee drinker. I worked through high school at Java Dave's where I prided myself on my ability to have a 4 shot iced latte and sleep like a baby right after. In college I worked at Starbucks for a year where I imbibed in coffee based beverages on a daily, if not tri-daily, basis. (I now know all the recipes and trust me, your ridiculous frappuccino does not really have much coffee in it)

So this all leads up to a shameful truth.... I have been cheating on my coffee maker.
I know, I know, it is terrible. I haven't used my coffee maker in weeks and my poor free trade breakfast blend coffee beans have been sadly neglected. This is all because of the new addiction in my life: Tea, but not just tea, tea from The Green Teahouse in West Hartford. It is simply amazing! (free shipping on orders over $50)

http://www.thegreenteahouse.com/
Please do yourself a favor if you are a tea lover and check out their site. They not only have a huge selection of loose leaf green, black, white etc teas but they also do blends. My absolute favorite is the Snow Jasmine blend: This jasmine green tea is one of the most highly prized in our store. The high quality green tea is superbly scented with jasmine flowers in the Szechuan province, which is the birthplace of green tea. (description from website) 
It is delicious hot or iced and there is something extra special about loose leaf tea blends. One of my friends and her husband got Logan and I a beautiful loose leaf tea pot for a wedding gift (Thanks Wes and Elizabeth, I absolute adore it!) and I have been using it daily to brew a pot of hot and put it in the refrigerator and thus have delicious, refreshing and full of antioxidants iced tea. 

Other favorites include Jasmine Berry (apparently I have a Jasmine fixation and it's also great iced), Coconut Spring (imagine drinking tea from a coconut on a sunny beach in Jamaica-it tastes just like that), Sweet Awareness and the Sweet Apple Chai. This list could go on and on but I imagine you get the point: 
                                            
                                The GreenTeahouse=awesome

Happy Drinking,
Steph

Wednesday, September 8, 2010

Creating a Home

One of the most exciting parts of moving to Connecticut was the prospect of owning our own home. As a serial apartment renter having a large space with an actual yard was exciting and yet scary. The inside decorating came much easier than the outside. I have been decorating apartments for years, but gardening...well it is a new pursuit. 

One of my favorite parts of our home is the deck. It is large and container gardening much less intimidating then actually putting plants in the ground. I love cultivating my own herbs but this year I added several pepper plants to the mix as well as a few flowering containers. 


I have gotten so much out of my containers. I have used my basil countless times and the peppers have done so well this year. Pictured from left to right: dill, cilantro, russian sage, lavender, serrano peppers, jalapeno pepper, rosemary, basil, and a citronella plant.

We moved here in mid June but didn't really get settled until July so fairly late in the growing season but I really wanted to do some veggis. This year I did a small vegetable garden where I grew tomatoes, yellow squash, zucchini, and cucumbers.


The tomatoes and cucumbers especially have produced prodigiously. Next year I will actually construct large beds because I want to do different kinds of tomatoes as well as some other varieties of vegetables.

Here is the backyard...as you can see, there is a lot of space but I have no idea what to do with it. I have been toying with the idea of raking up the steep hill and creating a wild flower garden. I am tempted but it would be a ton of work but I imagine it would be worth it. I have been researching it and it seems like I would need to get it done before the end of the fall since the seeds would need to be "winterized" meaning they (similar to tulip bulbs) need to sit in the ground through the cold season to help their growth in the spring/summer.


The title of this blog is "Creating a Home" so obviously, I have made a small step to creating a home other than the small bits of gardening...
                                                       WE BOUGHT A TREE!

I love trees and although our backyard has tons, our front yard was sadly lacking. When we started thinking about tree choices we really wanted something that would grow fairly quickly, be low maintenance, and have fall foliage. Back in Oklahoma you see Bradford Pear trees everywhere so when we saw a hybrid of those called Aristocrat Pear we were so excited! It was not some puny twig we were planting, but a nice 10 ft baby tree that already looked like a piece of home.
                                                                     BEFORE

                                                                  AFTER
Logan proudly planting our baby tree (isn't he cute in his scrubs?)
Aristocrat Pear in its glory, also can kind of see Rose of Sharon and the beautiful butterfly attracter flowers near the mailbox.

We also have taken out this terrible bush that was on the far right of the house (you can see if in the before picture). It was nice looking but attracted hundreds of flies so our neighbor helped us and we ripped that sucker out. You can barely see it in the after picture but we plated a Rose of Sharon there that has purple/blue flowers which will look so nice next year next to our blue hydrangeas.

I have bought a couple books on gardening and although I still feel like I have no idea what I am doing, but there is something so nice about putting a plant in the ground and seeing it flourish. We bought this house and we are slowly but surely making it our home.

Happy Planting,
Steph